What’s on your wall?
Create your own wall art with replacement kitchen door from DIY Homefit
Have you noticed the growing trend for gallery walls? No longer, it seems, is one carefully hung painting or photograph enough to grace a wall. Now it has to be full of them.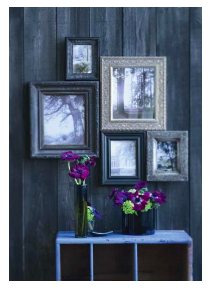
Many of us have an initial aversion to this idea. Surely it would look cluttered or messy? But, using the image on the right as an example, if done tastefully the results can be stunning.
In this article we explore how to design an effective gallery wall, including how to incorporate items you have created yourself.
There are seven simple steps to follow:
- Plan the theme
Is your gallery wall going to consist of anything in particular or just a random assortment of items? Anything is acceptable but you need to decide whether to use the opportunity to tell a story – perhaps of your life or your family – or simply represent an eclectic mix of things that are meaningful to you. - Plan the look
No matter how casual the look of a gallery wall, it does not happen just by chance. First of all you need to gather together all the items you are going to hang and think carefully about the pattern you would like to create. What is going to go where? Are you going to go or a staggered look or a more symmetrical grid format? - Choose a colour scheme
You also need to think about the type of frames you will use. Do you have a colour scheme in mind and do you want them to match or co-ordinate or be completely different? - Include upcycled items
Regular readers will know that at DIY Homefit we are big fans of upcycling and feature upcycling ideas regularly in this column. Creating a gallery wall is an ideal opportunity to add a personalised touch by including some of your own upcycled items such as the two ideas below:
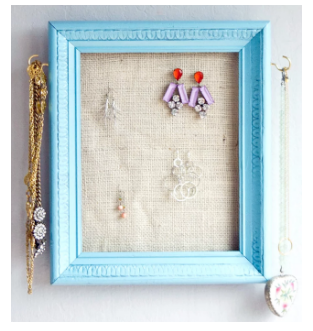
| If you have recently installed replacement kitchen doors and have spare wood available then you could use some of it to make a frame to create either a pin board or this practical jewellery organiser. From Popsugar |
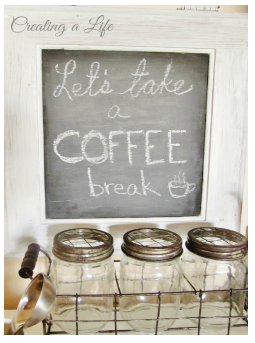
As well as considering pinboard, how about creating a distinctive chalkboard? This one was made from a kitchen cabinet door. As you can see they’re not just for children but add a touch of style to any wall! From Creating a Life Now |
 |
 |
- Plan the layout
It is helpful at this point to lay all the items ut on the floor and juggle them round until you find a configuration that you’re happy with. Even better if you can do it in front of the wall you are planning to hang them on as this makes it easier to imagine what the final result will look like. - Do a mock up
Using tracing paper or something similar, draw round each frame then cut the shape out. Place these cut out shapes in your chosen positions on the wall and fix lightly with masking tape or Blu Tack. - Finish the wall
Once you are confident that you have got things where you want them, go through your items one by one. Clean the wall to remove your fixing and any other dirt or grime, then hang your item using either picture hooks or picture hanging strips. It is advisable to use a spirit level to make sure that they are straight, and also hang them as close together as possible to create continuity.
We hope that by following the above steps you can create a gallery wall in your home that is both eye-catching and meaningful. Check back here soon for more home improvement tips from DIY Homefit.